How-To Achieve Airtight Sealing with a Handheld Vacuum Sealer
- emmaau2012
- Aug 8, 2025
- 7 min read
Updated: Feb 17
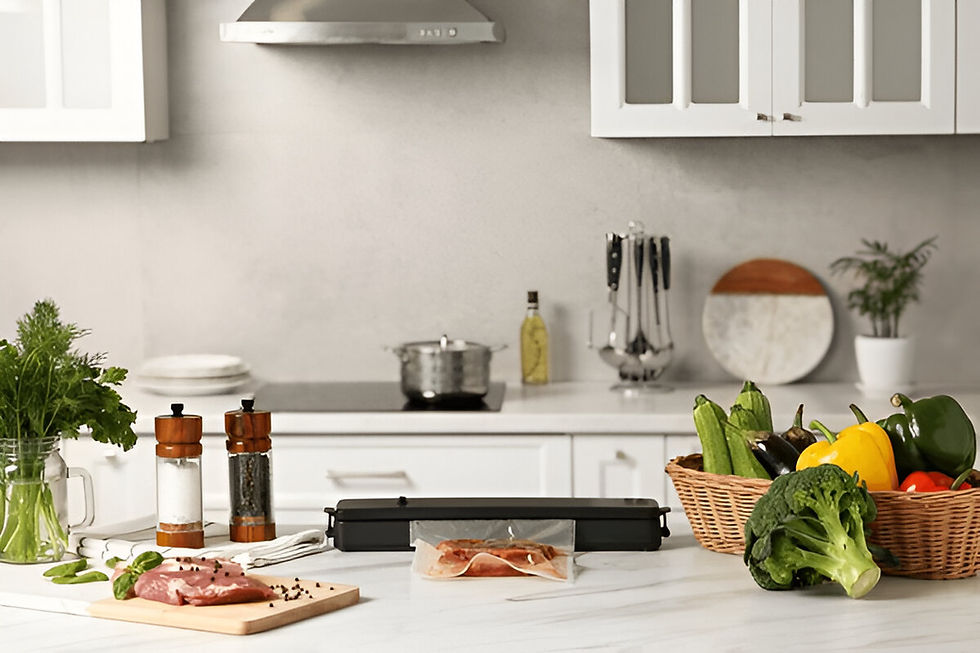
In today's world of food preservation and space-saving storage, handheld vacuum sealers have become indispensable kitchen tools. These compact devices offer a convenient way to extend the shelf life of perishable items by removing air and creating an airtight seal around food products. Unlike their bulkier countertop counterparts, handheld vacuum sealers provide portability and ease of use, making them perfect for small kitchens, camping trips, or quick food prep sessions.
The key to maximizing the benefits of your handheld vacuum sealer lies in achieving perfect airtight seals consistently. When done correctly, vacuum sealing can preserve food freshness up to five times longer than conventional storage methods. This guide will walk you through everything you need to know about selecting, using, and maintaining your handheld vacuum sealer to ensure optimal performance and food preservation results.
Choosing the Right Handheld Vacuum Sealer
Not all handheld vacuum sealers are created equal. When selecting your device, consider several important factors that will affect its sealing performance. Look for models with sufficient suction power, typically measured in watts, as this determines how effectively the device can remove air from bags. The sealing mechanism should feature durable heating elements that create strong, reliable seals without melting or damaging the bag material.
Pay attention to the type of bags the sealer uses - some models require proprietary bags with special channels for air removal, while others work with standard vacuum sealer bags. Consider the size of items you'll be sealing most frequently and choose a device with an appropriate nozzle size. Battery-operated models offer maximum portability but may have less consistent sealing power than plug-in versions.
Preparing Your Items for Vacuum Sealing
Proper preparation is crucial for achieving airtight seals. Start by selecting appropriate foods for vacuum sealing - most dry and moist foods work well, but avoid sealing powders or fine grains that could get sucked into the vacuum mechanism. Cut larger items into manageable portions that will fit comfortably in your vacuum bags.
For liquids or moist foods, consider pre-freezing them for a few hours to prevent liquid from being drawn into the vacuum chamber. Wipe any excess moisture from food surfaces, as water can interfere with the sealing process. Arrange items neatly in the bag, leaving at least three inches of empty space at the top for proper sealing. For delicate items that might get crushed by the vacuum pressure, use the pulse function if your sealer has one, or place a paper towel inside the bag to absorb excess moisture.
Proper Bag Handling Techniques
The way you handle and position your vacuum bags significantly impacts sealing success. Always use bags specifically designed for vacuum sealing, as regular plastic bags won't create airtight seals. When filling bags, avoid overpacking - leave enough empty space so the bag can lie flat when sealed.
Fold the open end of the bag outward about an inch to create a clean surface for the sealer to grip. This also helps prevent food particles or liquids from contaminating the sealing area. For double protection, consider using the double-seal method: after the initial seal cools, make a second parallel seal about half an inch above the first one.
When working with liquids or moist foods, position the bag so the opening is elevated above the food contents during sealing to prevent liquid from reaching the sealing area. If your sealer has a moisture trap feature, make sure to use it according to the manufacturer's instructions.
Mastering the Vacuum Sealing Process
Achieving perfect seals requires proper technique with your handheld vacuum sealer. Begin by ensuring your device is fully charged or properly connected to power. Insert the open end of the prepared bag into the sealer's nozzle or sealing channel, making sure it's positioned straight and even.
Activate the vacuum function and hold the device steady as it removes air from the bag. Watch the bag closely - you'll see it shrink tightly around the contents as air is extracted. Most sealers will automatically switch to the sealing phase once sufficient vacuum is achieved, but some models require you to manually initiate the seal.
Apply gentle downward pressure during sealing to ensure good contact between the heating element and bag material. Allow the seal to cool completely before handling - premature movement can weaken the seal. After sealing, inspect the seam carefully - it should be smooth, even, and completely fused with no gaps or wrinkles.
Troubleshooting Common Sealing Issues
Even with proper technique, you may occasionally encounter sealing problems. If your sealer fails to create a complete seal, check for moisture or food particles in the sealing area and clean both the bag and sealer thoroughly. Weak suction could indicate a clogged filter or worn-out seals in the device itself.
For bags that won't stay sealed, ensure you're using the correct bag type for your sealer and that the sealing strip is clean and free of debris. If seals appear wrinkled or incomplete, try increasing the sealing time if your device allows adjustments. Bags that melt during sealing suggest the heat setting is too high or the sealing time too long.
When dealing with particularly challenging items like leafy greens or irregularly shaped objects, consider using larger bags and leaving extra space around the items to allow for proper air removal. For powdered substances, place a coffee filter inside the bag near the opening to prevent particles from entering the vacuum mechanism.
Maintaining Your Handheld Vacuum Sealer
Regular maintenance ensures consistent sealing performance and extends your device's lifespan. After each use, wipe down the sealing area with a clean, dry cloth to remove any food residue or moisture. For devices with removable filters, clean or replace them according to the manufacturer's recommendations.
Store your vacuum sealer in a dry place away from extreme temperatures. If your model uses rechargeable batteries, follow proper charging cycles to maintain battery health. Periodically check the sealing strip for wear and tear - a damaged strip won't create reliable seals.
For optimal performance, run a test seal every few months using an empty bag to verify suction power and sealing effectiveness. If you notice declining performance, consult your user manual for troubleshooting tips or contact the manufacturer for service options.
Creative Uses Beyond Food Preservation
While food storage is the primary use for handheld vacuum sealers, these versatile devices have many other applications. Use them to protect important documents from moisture and air exposure while traveling or storing. Seal small electronic devices like phones or cameras when going to the beach or poolside to prevent water damage.
Campers and outdoor enthusiasts can vacuum seal portions of toiletries, first-aid supplies, or matches to save space and keep items dry. For crafters, vacuum sealing works well for preserving delicate materials like wool or fabrics that might be damaged by moths or moisture.
In emergency preparedness kits, vacuum-sealed items stay protected from the elements and take up minimal space. Even wardrobe storage benefits from vacuum sealing - off-season clothes can be compressed to a fraction of their normal size while being protected from dust and pests.
Safety Considerations and Best Practices
While handheld vacuum sealers are generally safe, observing some basic precautions will ensure trouble-free operation. Always operate your device on a stable, flat surface to prevent accidental drops during use. Keep the vacuum nozzle and sealing area clear of obstructions to maintain proper airflow.
Never attempt to vacuum seal glass containers or sharp objects that could puncture the bag. Be cautious when sealing liquids - rapid pressure changes can sometimes cause bags to burst if not handled properly. Store vacuum-sealed items properly - while the seal prevents air exposure, perishables still require refrigeration or freezing as appropriate.
When working with raw meats, follow standard food safety protocols and clean your sealer thoroughly afterward to prevent cross-contamination. Always supervise the sealing process and never leave the device unattended while in operation.

Comparing Handheld vs. Countertop Vacuum Sealers
Understanding the differences between handheld and countertop vacuum sealers helps determine which best suits your needs. Handheld models excel in portability and convenience for small jobs, while countertop units typically offer more power and versatility for larger quantities.
Handheld sealers are ideal for quick, on-the-go sealing of individual portions or small batches. They take up minimal storage space and are perfect for travelers or those with limited kitchen real estate. Countertop models, while bulkier, can handle larger bags and often feature more advanced settings for different types of foods.
Consider your typical usage patterns - if you frequently seal large quantities of food or bulky items, a countertop model might be more efficient. For occasional use with small portions, a handheld sealer provides sufficient functionality without the storage commitment.
Advanced Techniques for Perfect Seals
Once you've mastered basic vacuum sealing, try these advanced techniques for even better results. For marinating meats, vacuum seal with your marinade and refrigerate - the vacuum process helps flavors penetrate faster. When sealing multiple small items, use chamber bags and create separate compartments with impulse sealer techniques.
For sous vide cooking, ensure your vacuum seal is completely airtight by performing a water immersion test - submerge the sealed bag and check for escaping bubbles. When storing sharp-edged items, cushion them with paper towels or bubble wrap inside the bag to prevent punctures.
Experiment with partial vacuuming for delicate items like berries or baked goods - some sealers allow you to control suction strength to prevent crushing. For long-term storage, consider oxygen absorbers in addition to vacuum sealing for maximum preservation.
Conclusion: Mastering the Art of Airtight Sealing
Achieving perfect airtight seals with your handheld vacuum sealer is a skill that improves with practice and attention to detail. By selecting the right equipment, preparing items properly, and using correct techniques, you can maximize the benefits of vacuum sealing in your kitchen and beyond.
Remember that consistent maintenance and proper storage of your device are just as important as the sealing process itself. With time, you'll develop an intuitive sense for troubleshooting common issues and optimizing results for different types of foods and items.
Whether you're preserving seasonal produce, preparing meals in advance, or protecting valuable items, mastering your handheld vacuum sealer opens up a world of storage possibilities. The initial investment of time in learning proper techniques pays off in extended food freshness, reduced waste, and more efficient use of storage space.


Comments